Creating your first website can be an overwhelming task. Most people don’t want to become a programmer just to create a website or blog, and they don’t want to invest thousands of dollars either. As with most things, there is an easier more cost effective alternative. If you need to get a business website set up and running fast, or you just want to start a blog, this guide will help you set it up as fast as possible. No programming knowledge required!
What you will learn
In this guide you will learn how to find a domain name, set up hosting and create your first website. You will be using WordPress as the web platform because of its global popularity, ease of use and massive plugin library. In case you were wondering, WordPress is a free Content Management System(CMS) and powers a large portion of websites and blogs on the internet. And because of its popularity it is easy to find answers to any common questions regarding themes, plugins and general configuration changes.
If you are ready, please follow along with the step by step process listed below.
Step 1) Find an available domain name
Step 2) Setup your web hosting and register your new domain name
Step 3) Change some settings in WordPress
Step 4) Adding a Theme
Step 5) Setting up Email Accounts
Step 1 – Finding an available domain name.
Before you begin the process of setting up hosting and building your first website, think about the domain name you want. Over the years this task has become one of the more difficult points in the process. For example, single word domains like Candy.com were taken long ago, even 2 an 3 word domains are becoming harder to find.
Here are some tips that may help make this task easier for you.
1) Your domain name should be easy to spell and remember.
2) Try to avoid names that include numbers or dashes when possible.
3) Avoid names that include trademarked names of existing products or brands. Ignoring this tip will only lead to trouble later.
4) Avoid Top Level Domain(TLD) extensions other than .com if possible, especially if you hope to create a recognizable brand.
5) Write down your list of ideas and cross them off if they are not available.
Use this page (https://www.bluehost.com/domains) to search for the availability of any names you come up with.
I know this can be a frustrating process when you have a great idea for a name and it has already been taken. Just take your time with this because you want to think of your domain name as the front door to your business, blog or product.
Step 2 – Setup your web hosting and register your new domain name.
Okay, now that you have found your domain name let’s set up your hosting account.
1. Go to www.Bluehost.com

2. Click on the Get Started button.
Now you will see a list of hosting plans to choose from. Read through each one to see the features available, if this is your first website just select the cheapest plan. You can always upgrade later if you need the additional features such as unlimited websites.
Currently there are the following plans to choose from:
- Basic
- Plus
- Choice Plus
- Pro
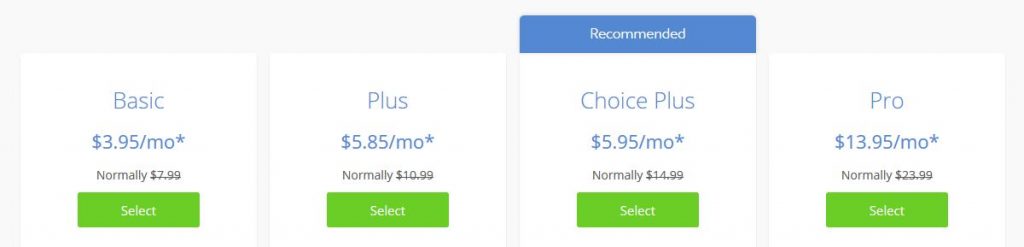
Once you have decided on the plan you want, click on the Select button.
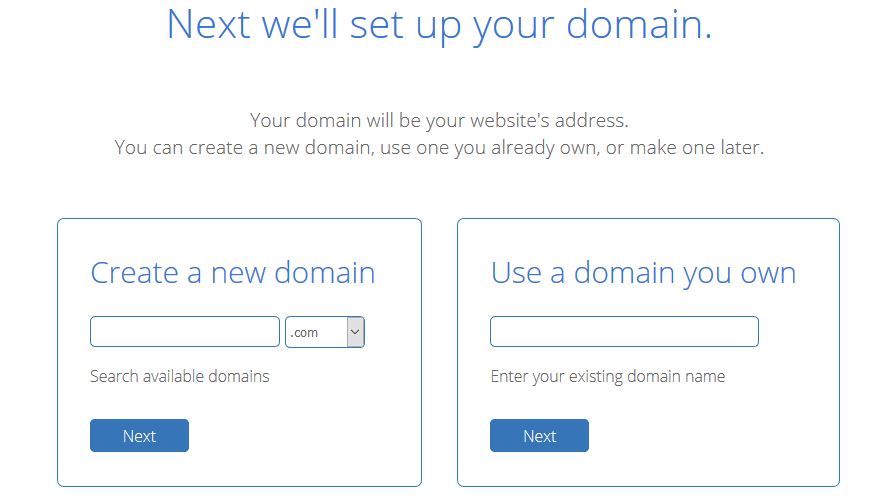
3. Now, you should be presented with an option to add your new domain name that you found in step 1. Enter that name in the “Create a new domain” box, then click the Next button.
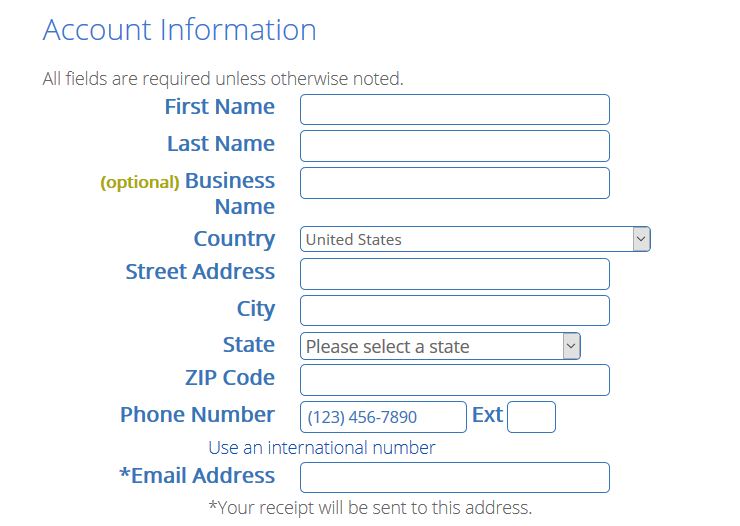
4. At the next screen you will be asked to enter your account information. After completing that section scroll down to the “Package Information” section.
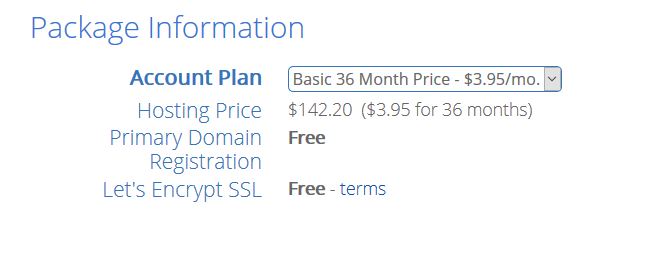
5. In the “Package Information” section just verify the “Account Plan” that you want, you can make changes here if needed. After you have completed this section scroll down to the Package Extras section.
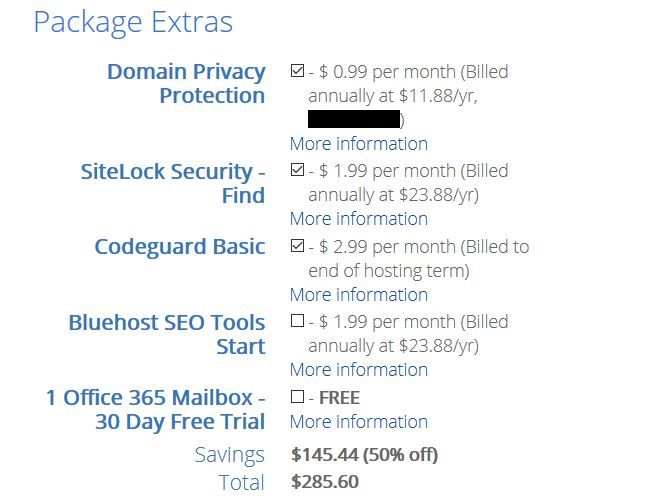
6. From the “Package Extras” section choose the options you want, click on the More Information link under each item to get an more details about what that is and why you might need it. After you have completed this section scroll down to the “Payment Information” section.
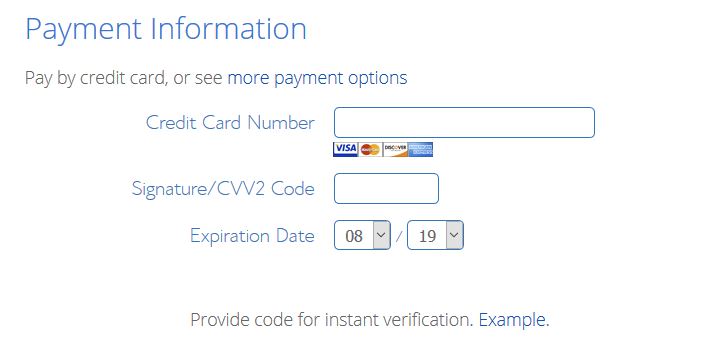
7. Now you are ready to enter your payment information. Once you have done that, just read the terms of service agreement, check the box indicating that you have read and agree to the terms, then click the submit button.
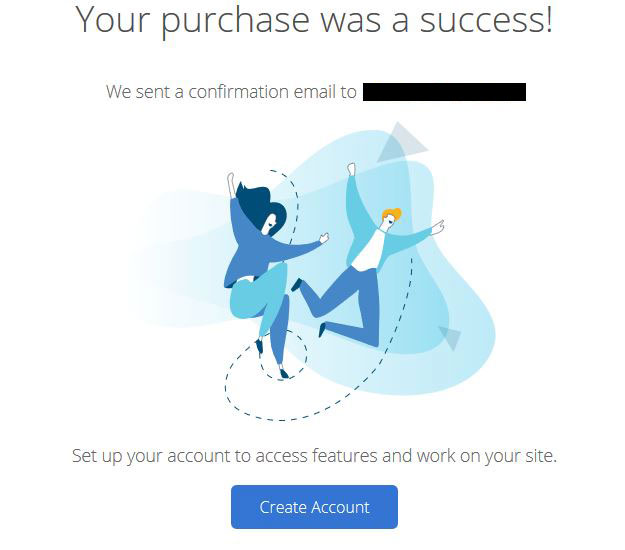
8. After processing your payment you should see this confirmation screen, now click on the “Create Account” button to proceed.
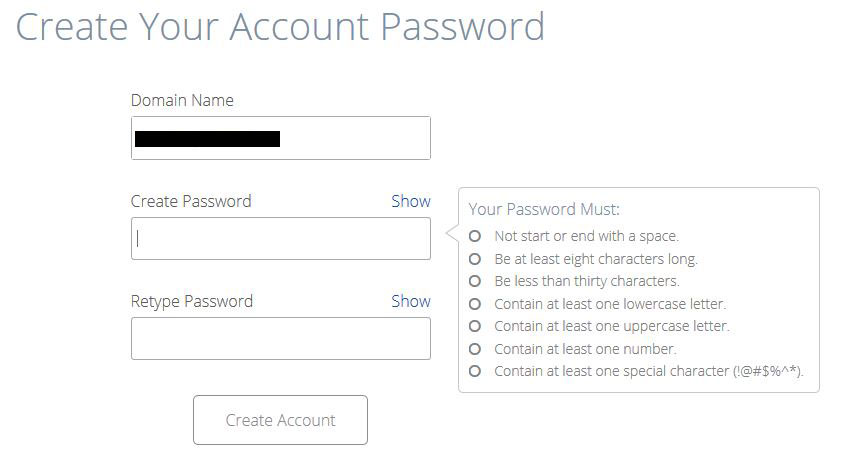
9. Now you should see the screen below, from here you want to create your account password, then click the “Create Account” button to proceed.
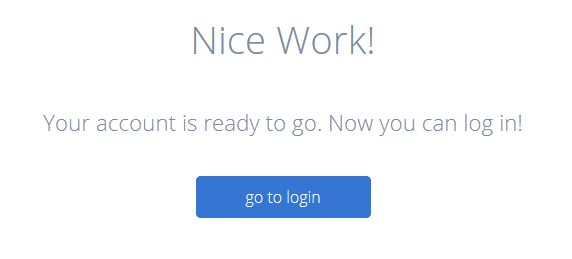
10. Now your account is ready, click on the “go to login” button to proceed.
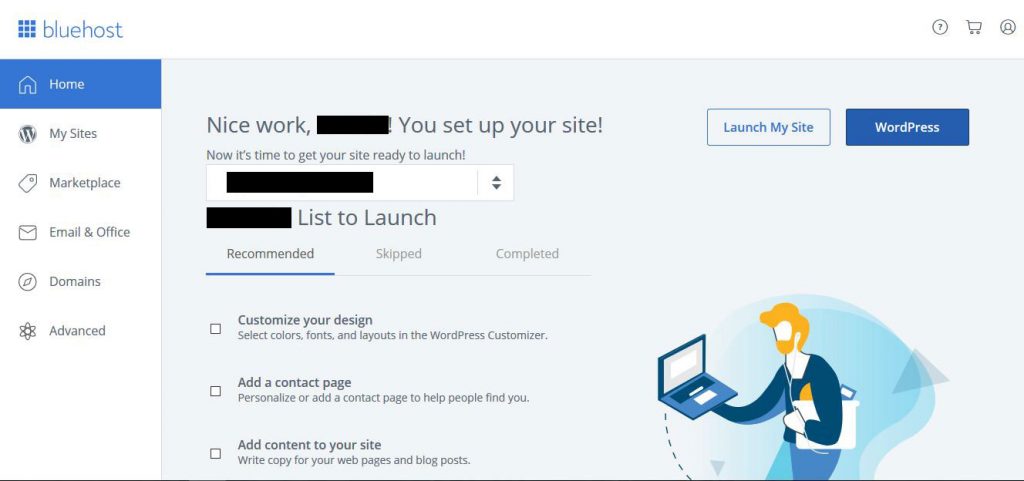
11. Now you should see a screen similar to the one below, just click on the “WordPress” button and you will see the WordPress administration interface.
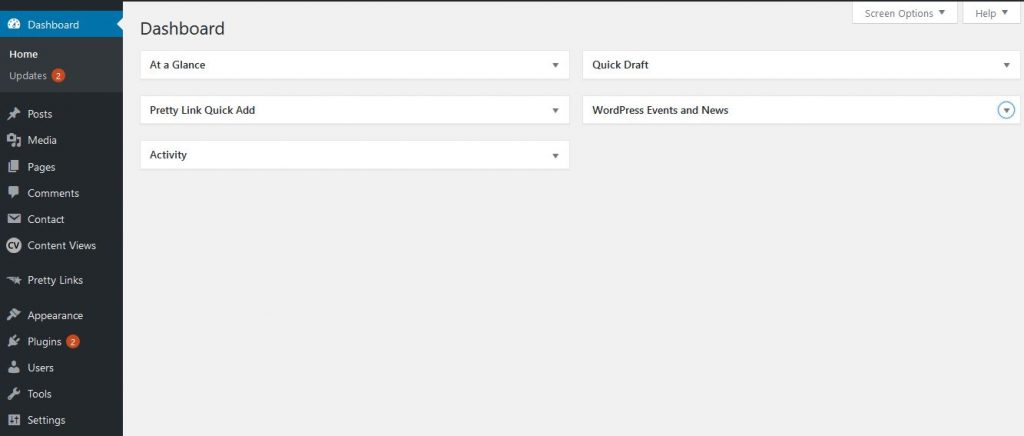
12. You should now see the WordPress dashboard similar to the image below. This is where you will manage everything about your website. Settings, Themes, Plugins and Content will be added or modified from this panel. It may look overwhelming at first, but you will get used to it fairly quickly.
Step 3 – Change some settings in WordPress
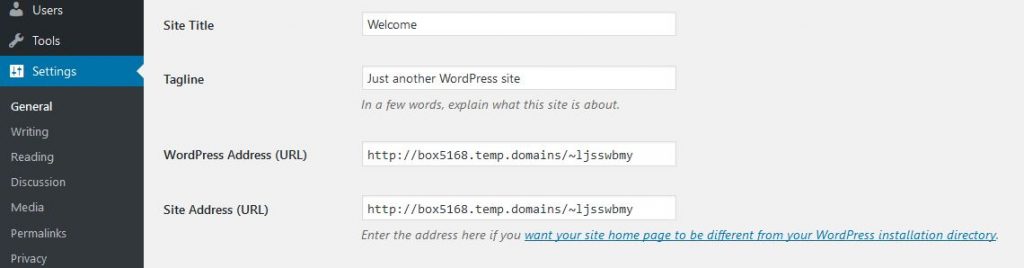
1. Now the first think you want to do is modify the settings for the website. From the menu on the left side click on Settings. Form here you can change a lot of basic information about your site, but for now just change the Site Title to your Domain Name (you can change this to anything you want). The site title is what will appear in the tab of your browser window and will also be the default name in the header of your site, at least until you replace it with a logo. Then either change the Tagline or remove it completely. The Tagline will appear under your site title or logo in the header, most people just leave this blank.
Step 4 – Adding a Theme
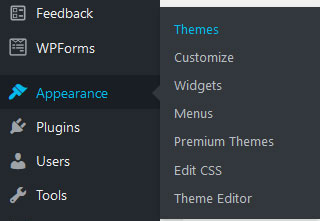
1. To add a theme navigate to Appearance then select Themes from the pop out menu.
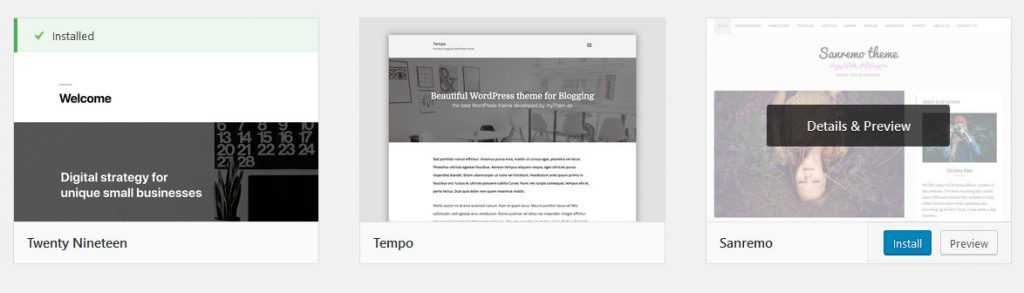
2. Then you will have a few options to choose from, Premium Themes (paid), WordPress.org Themes (free) or Upload if you have purchased a theme and downloaded from somewhere else. For now choose WordPress.org Themes.

3. From here you can just browse for a theme that fits the type of website or blog you want to build. You will probably spend a large amount of time just previewing different options. But, for now just pick one and install it, my favorite is GeneratePress because it has a simple light layout, plus you can upgrade to the premium theme later if you need more advanced features.
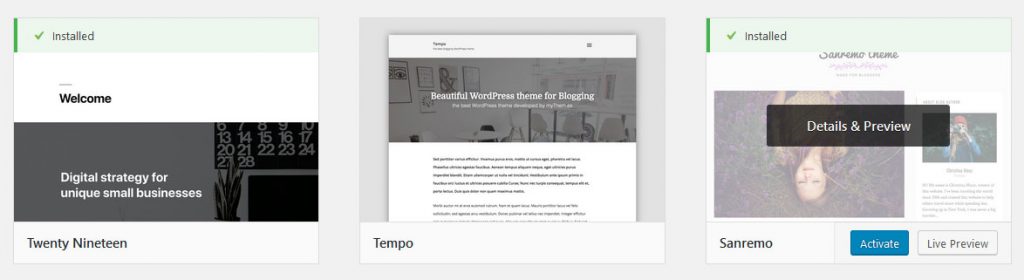
4. After you install your new theme just click on the Activate button to set it as your default.
5. Now you can see what the new theme looks like by either clicking on the Home button at top of the page, or hover over your Domain Name and select Visit Site.
6. Now you have a basic website setup and are ready to start adding content. You can do that in 2 ways, Posts or Pages. Posts will be your articles or content that you may want to allow comments from your readers. Pages are generally static content such as About Us, Terms and Conditions etc. There should be some default content in each area, just play around with each section by adding and deleting content until you feel comfortable with the available tools.
Setting up Email Accounts
1. After logging in to Bluehost.com choose Advanced settings from the menu on the left.
2. In the Advanced section expand the Email section if it isn’t already.

3. Click on Email Accounts

4. From here you can manage existing email accounts or add new ones for your domain name.
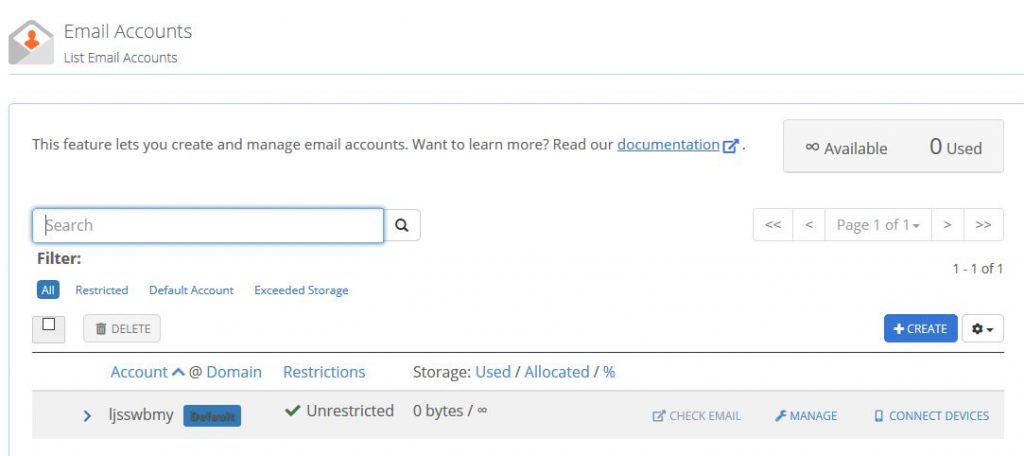
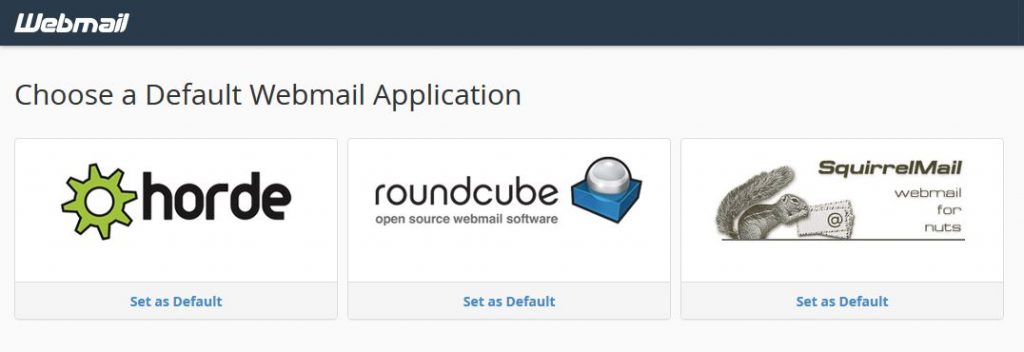
5. If you click on the “CHECK EMAIL” you will also be able to choose which Webmail interface you prefer. Roundcube is probably my favorite. This can be changed later from the Webmail interface by clicking on the option dropdown next to your username on the toolbar at the top of the page.